Enclosures, adapters and workshop accessories. Mostly small parts that solve a specific problem — usually a piece of electronics that needs a housing.
I draw everything myself in Autodesk Fusion and prepare the prints in Bambu Studio. This page fills up over time, with the settings actually used and whatever had to be adjusted before the part fitted.
Project
Liten ESP v2 — enclosure for an ESP32 mini
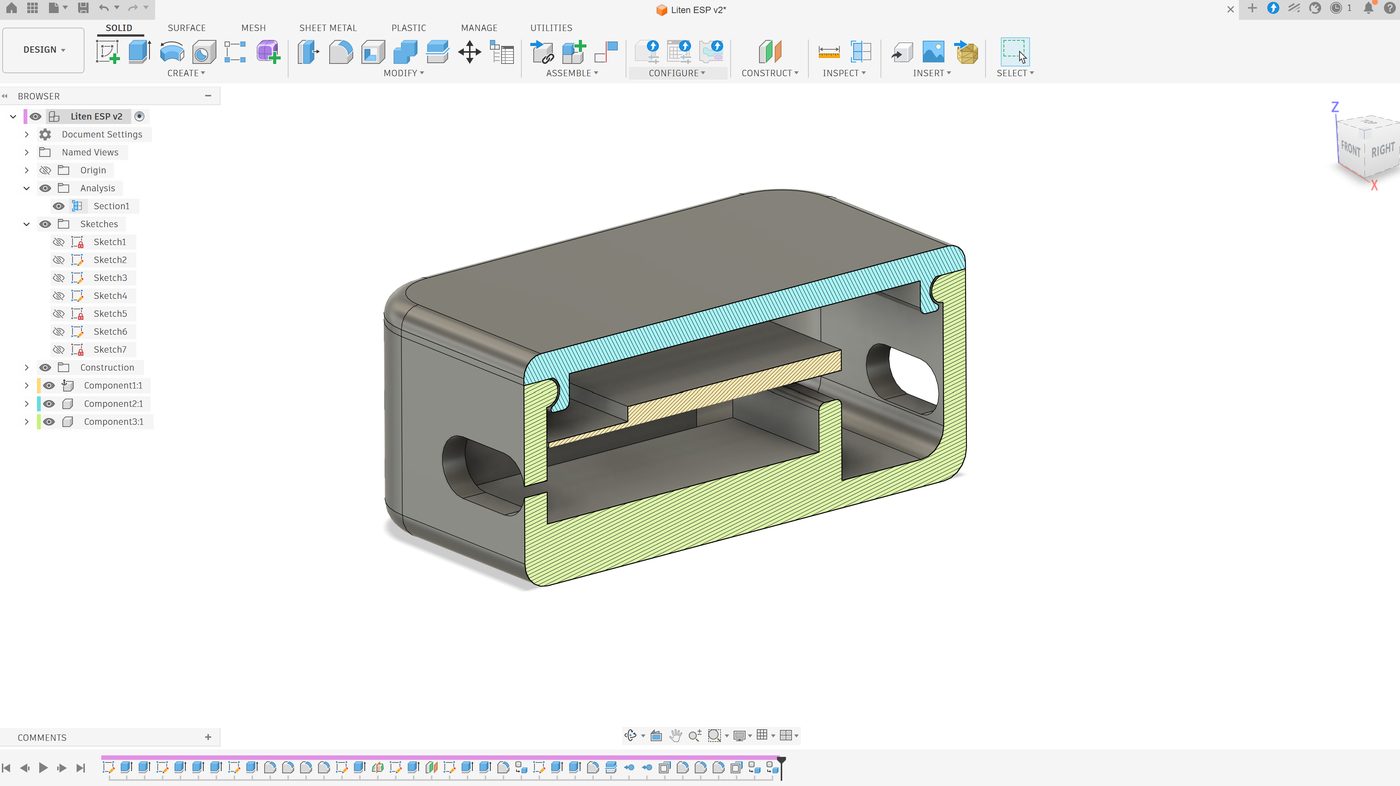
A three-part housing for an ESP32 mini board: base, lid and an internal shelf that holds the board in place. Cutouts for USB and cables are built into the wall, so nothing sticks out. The section view in Fusion is used to check wall thickness and clearance around the board before it goes to print.
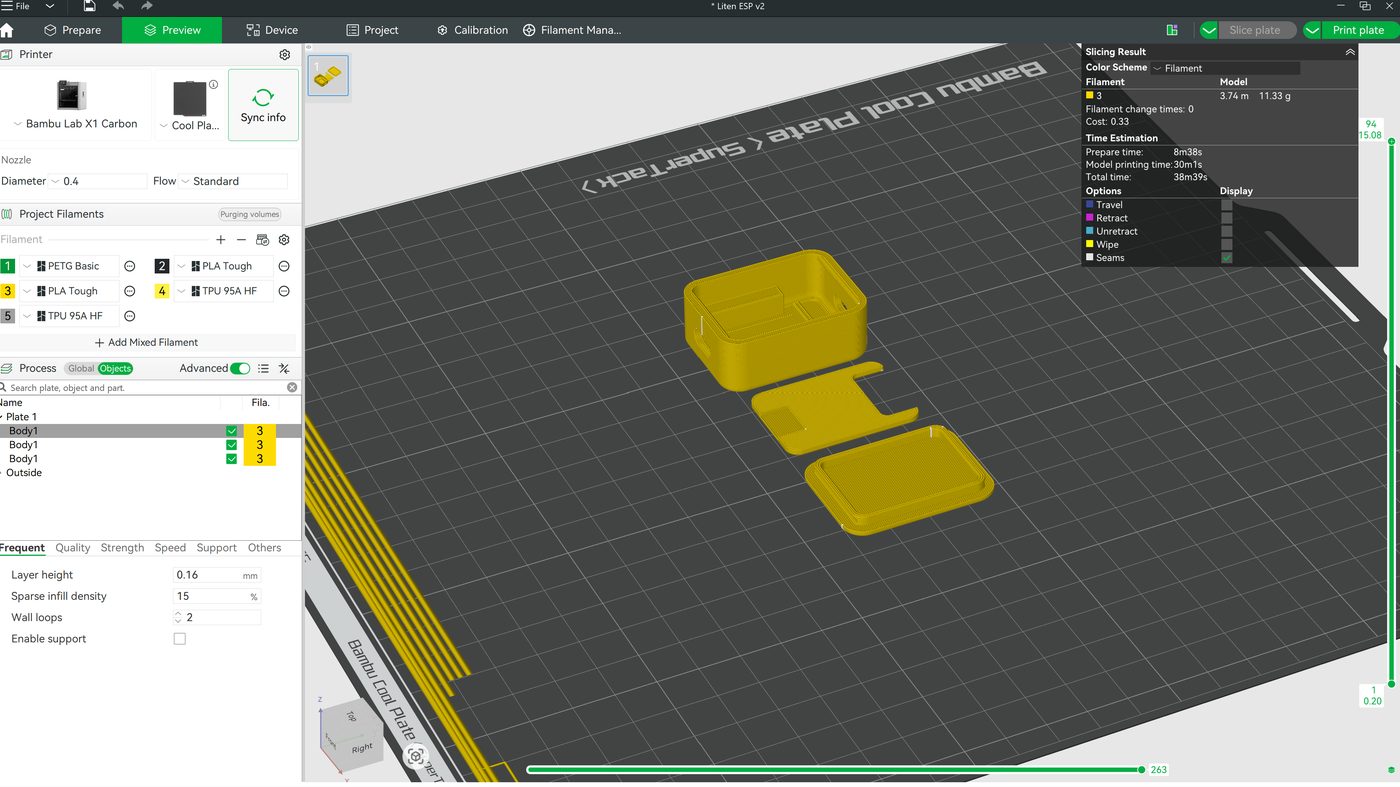
PrinterBambu Lab X1 Carbon
MaterialPLA Tough
Layer height0.16 mm
Nozzle0.4 mm
Infill15 %
Walls2
Filament used11.3 g · 3.74 m
Time38 min
SupportsNo
Process
From drawing to build plate
The part is drawn in Fusion, where a section view is used to look inside and check clearances before anything is printed.
Autodesk Fusion — section through Liten ESP v2
The model is then split up and laid out on the plate in Bambu Studio, which works out time and material use before printing.
Bambu Studio — base, shelf and lid on one plate
Equipment
Ten years of printers
I have been printing since 2016 and have been through three machines. The order says quite a lot about how the hobby has developed over the same period.
FlashForge Finder — the first one. Simple, enclosed and good to learn on.
FlashForge Dreamer — two nozzles and a bigger build volume.
Bambu Lab X1 Carbon with AMS — the current machine. Fast, and with AMS for several materials in one print.
DesignAutodesk Fusion
SlicerBambu Studio
Nozzles0.2 · 0.4 · 0.6 mm
MaterialMost things the X1C handles
The nozzle is chosen to suit the part: 0.2 mm when the details are small, 0.6 mm when it just has to be quick and strong. For materials I use most of the Bambu Lab range, picking whatever the part needs to survive in heat, wear and bending.